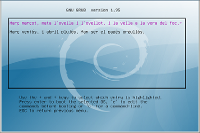
Grub2 multiboot

17:19

У меня была похожая проблема...
Люди подсказали:
-----------------------------
# apt-get install os-prober
# os-prober
# update-grub2
-----------------------------
Первая строчка- доустановка модуля поиска "других" OS.
Вторая- запуск модуля- поиск "осей".
Третья- внесение изменений в меню GRUB'a.

(c)

rsync

00:20
sudo rsync -r -n -t -p -o -g -v --progress -u -l  /home/ /media/new_home/

(c)

Количество пакетов к обновлению(консоль)

22:55

Q: Вобщем как можно вывести в консоль количество пакетов которые подлежат обновлению после apt-get update ???
Облазил все поисковики... ничего похожего не нашёл... :( Да и у самого идей нет как такое осуществить :( но очень надо :(

A: 

Сам недавно столкнулся с точно такой же ситуацией, только наоборот - дома трафик дорогой, а на работе unlim. ;) Погуглив, где-то на ubuntuforums (к сожалению, не помню уже где), наткнулся на простое и изящное (ИМХО) решение :
#!/bin/bash
apt-get upgrade -y --print-uris | cut -d"'" -s -f2 > ~/upgrade_package_names.txt

После чего получаю в домашнем каталоге файлик с URL`ами upgrade_package_names.txt

(c) 1, 2
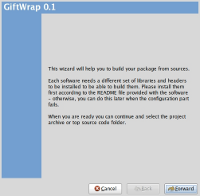
GiftWrap, a User Friendly Package Maker for Ubuntu

11:24

giftwrapGiftWrap is a hassle-free way to create Ubuntu packages. It is designed for anyone who deals with distributing software - be it theme artists, software developers, or anyone else.It stems from the (now dead) Deb Creator project.In the future, it will support updating of existing packages, uploading to PPA's split packages and more.


Installation :
Open your sources.list and add GiftWrap's Official Launchpad repository :

$sudo gedit /etc/apt/sources.list

For Ubuntu Jaunty Users :

deb http://ppa.launchpad.net/giftwrap/ppa/ubuntu jaunty main
deb-src http://ppa.launchpad.net/giftwrap/ppa/ubuntu jaunty main


For Ubuntu Intrepid Users :

deb http://ppa.launchpad.net/giftwrap/ppa/ubuntu intrepid main
deb-src http://ppa.launchpad.net/giftwrap/ppa/ubuntu intrepid main


Save and exit.Now import the public key with this command and update the system :

$sudo apt-key adv --keyserver keyserver.ubuntu.com --recv-keys 207CAD03
$sudo apt-get update

Now install GiftWrap :

$sudo apt-get install giftwrap

After installation done (you may be asked for some configurations like mail server etc.If you do not know what you are doing, just select "No Configuration" ), you can run GiftWrap via Applications > Programming > GiftWrap OR giftwrap command and start building your own Ubuntu packages ;)

(c)

Далее

Howto Recover Grub2 After Windows Installation

11:12

grub2Today i destroyed my Grub2 via installing windows on my notebook which i write blog posts.(I quit smoking , so i have to play some games : ) No rush). It may be hard to recover it since there are not much (i did not find anything) howtos around the net about recovering Grub2.Here is the step by step guide to recover it :
You will need a LIVE cd if you are going to recover an Ubuntu Box.Download Ubuntu Jaunty, Karmic whatever you want.Open the system with Live CD (I assume you are using Ubuntu Live CD).Press Alt+F2 and enter gnome-terminal command.And continue by entering :

$sudo fdisk -l

This will show your partition table.Here is my table to understand it better :

/dev/sda1 29 8369 66999082+ 83 Linux
/dev/sda2 * 8370 13995 45190845 7 HPFS/NTFS
/dev/sda3 13996 14593 4803435 5 Extended
/dev/sda5 13996 14593 4803403+ 82 Linux swap / Solaris

Now i will mount Linux (sda1 here), i have no external boot partition as you can see.(IF YOU HAVE external one, do not forget to mount it! )

$sudo mount /dev/sda1 /mnt
$sudo mount --bind /dev /mnt/dev
$sudo mount --bind /proc /mnt/proc

The following command is optional (it copies resolv.conf)

$sudo cp /etc/resolv.conf /mnt/etc/resolv.conf

Now chroot into the enviroment we made :

sudo chroot /mnt

After chrooting, you do not need to add sudo before your commands because from now, you will run commands as root.

You may want to edit /etc/default/grub file to fit your system (timeout options etc)

#nano -w /etc/default/grub

Play with the options if you want.(But do not forget to give grub-update command if you saved it ;) )

Now install/recover Grub2 via :

#grub-install /dev/sda

command.However you may get errors with that code like me.If so please use this command :

#grub-install --recheck /dev/sda

Now you can exit the chroot, umount the system and reboot your box :

#exit
$sudo umount /mnt/dev
$sudo umount /mnt/proc
$sudo umount /mnt
$sudo reboot

(c)

Далее

sK1 Ubuntu Repository (Vector Graphics Editor For Linux)

00:10

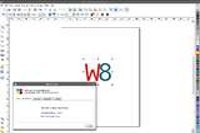
sK1 A few months ago I was telling you about sK1, an open source vector graphics editor similar to CorelDRAW, Adobe Illustrator, or Freehand. At the time, you had to compile it, but now (actually it exists for quite some time, but I wasn't aware of it) there is an Ubuntu repository from where you can install the latest version.

Why sK1 and not InkScape?

While InkScape is oriented to the SVG format and is ideal for web design, sK1 targets professional designers from the prepress world. So sK1 supports CMYK, multiple pages and separating colour plates.

More info about sK1.

Adding sK1 Launchpad PPA repository

Open a terminal and paste the following command to add the PPA repository:

-For Ubuntu Jaunty (9.04):
sudo sh -c "echo 'deb http://ppa.launchpad.net/stani/ppa/ubuntu jaunty main' >> /etc/apt/sources.list"

-For Ubuntu Intrepid (8.10):
sudo sh -c "echo 'deb http://ppa.launchpad.net/stani/ppa/ubuntu intrepid main' >> /etc/apt/sources.list"

Then, add the GPG key:
sudo apt-key adv --recv-keys --keyserver keyserver.ubuntu.com 7B0FB2CA

And finally, install sK1 in Ubuntu Linux:
sudo apt-get update && sudo apt-get install sk1

Download sK1 .deb for Ubuntu 9.04 (Jaunty) without adding the PPA repo

Additionally, you can just download the Ubuntu .deb if you want. But before installing it, you need to firstly install some dependencies, so open a terminal and paste this:
sudo apt-get install tcl8.5 tk8.5 python-imaging python-imaging-tk python-liblcms python-reportlab

Then you can download and install sK1 .deb: Ubuntu 32 bit | Ubuntu 64bit


A note from the PPA maintainer: this is the development version of sK1 and the packages have not been tested by a critical mass. In case you have problems, you should report them on the sK1 forums. The packaging is not perfect yet. For example there will be no entry in the start menu. This will be fixed in a next release. I've sent Igor from sK1 the necessary files to resolve this issue. So for now start sK1 by typing "sk1" in the run dialog (Alt+F2) or in a terminal.

As a final remark: you need to remove your ~/.sk1 folder, otherwise sK1 might have troubles starting up.

[thanks to Stiani for maintaining the PPA]

Далее

Force New Windows To Start Centered

23:54

This quick tip is for Gnome users. I always wanted new windows to start centered on the desktop but never searched for something to modify this behavior. But yesterday I stumbled onto something which fixes this by changing 2 parameters in Gnome's almighty gconf editor:

Press Alt+F2 and enter gconf-editor, then set the following two values:

Key: /apps/metacity/general/focus_new_windows Value: smart
Key: /apps/compiz/plugins/place/screen0/options/mode Value: 1

Now your applications should start up nice and centered.

Link

Free, Cross-Platform Password Manager: KeePassX

23:20
KeePassX Password Safe is a free, open-source, light-weight and easy-to-use password manager for Linux, Windows and Mac OSX. Originally KeePassX was called KeePass/L for Linux since it was a port of Windows password manager Keepass Password Safe. After KeePass/L became a cross platform application, it changed it's name to KeePassX

KeePassX offers a little utility for secure password generation. The password generator is very customizable, fast and easy to use. Especially someone who generates passwords frequently will appreciate this feature.


The complete database is always encrypted either with AES (alias Rijndael) or Twofish encryption algorithm using a 256 bit key. Therefore the saved information can be considered as quite safe. KeePassX uses a database format that is compatible with KeePass Password Safe. This makes the use of that application even more favourable.

Enable Menu And Buttons Icons In Gnome 2.28

20:57

The menu and button icons are disabled by default in Gnome 2.28, like I was telling you some time ago. Basically, this is how the menus and buttons look like in Gnome 2.28.

But this can be changed. For the menu part, it's very easy: just go to System > Preferences > Appearance and under the Interface tab, check the "Show icons in menus" box.

Now, for the buttons, run the following commands in a terminal:

gconftool-2 --set /desktop/gnome/interface/buttons_have_icons --type bool true
gconftool-2 --set /desktop/gnome/interface/menus_have_icons --type bool true

This is how the menus and buttons will now

Link

Два монитора на одной видеокарточке

13:09

Несмотря на то, что у меня видеокарта NVidia Geforce 8500GT, я не стал пользоваться TwinView, поскольку она дает меньше рычагов для управления мониторами. Поэтому в статье рассматривается более традиционный метод.
Дано
Итак, пусть имеется одна видеокарта с DVI и D-SUB выходами. Пусть так же имеется два монитора.
Вопрос:
Как эти мониторы присоединить к видеокарте и использовать одновременно?

Ссылка
Ссылка2